Simple straightforward tutorial on how to add products to you shop.
If you prefer to follow the video tutorial instead you can go to this link.
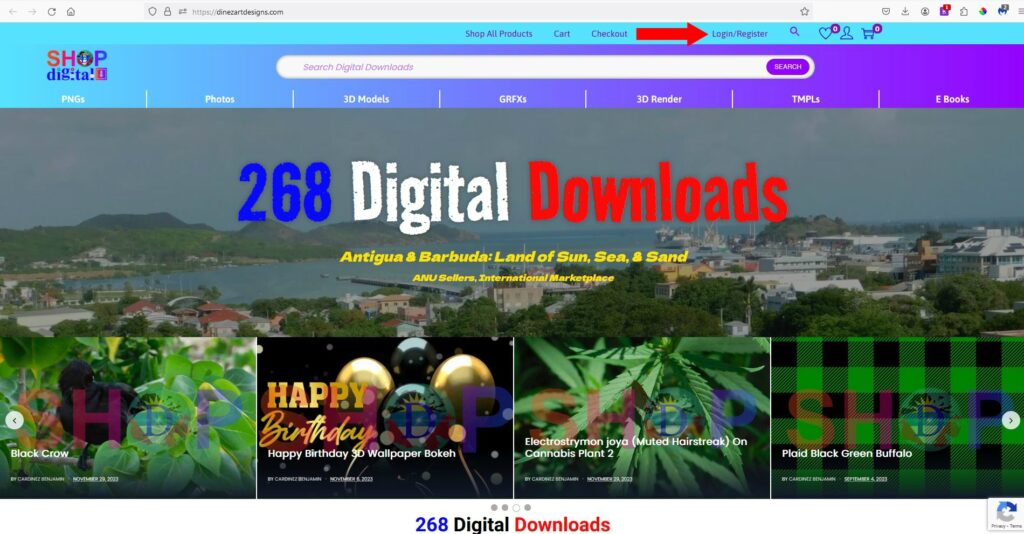
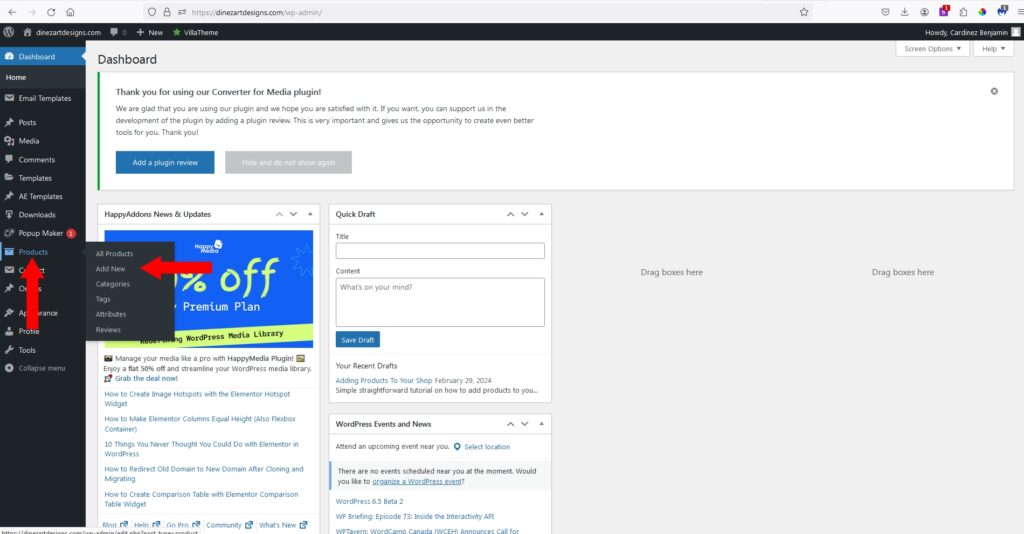
Back on the homepage you would go to dashboard located your top left hand corner. Where the site name is displayed dinezartdesigns.com. Once you put your mouse cursor over that link you would get a drop down link that leads you to your Dashboard where you can simply click on dinezartdesigns.com or the drop down “Dashboard” link.
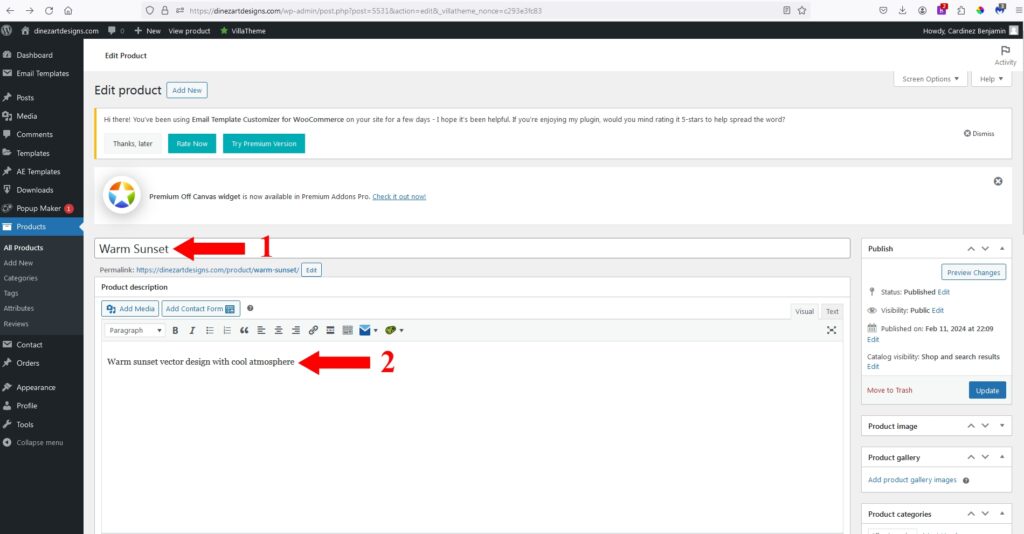
On the Add New Product Page
- Fill in the name of the Product
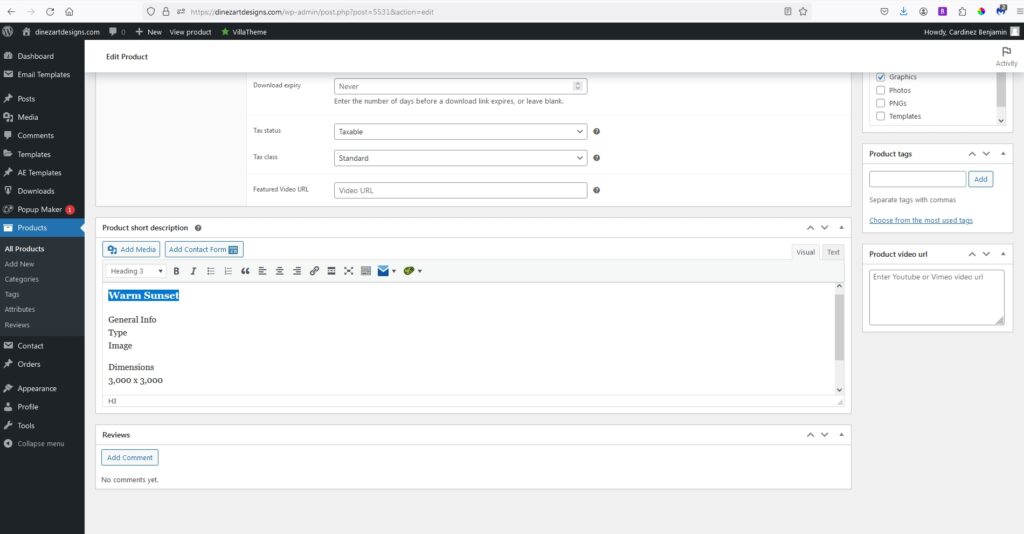
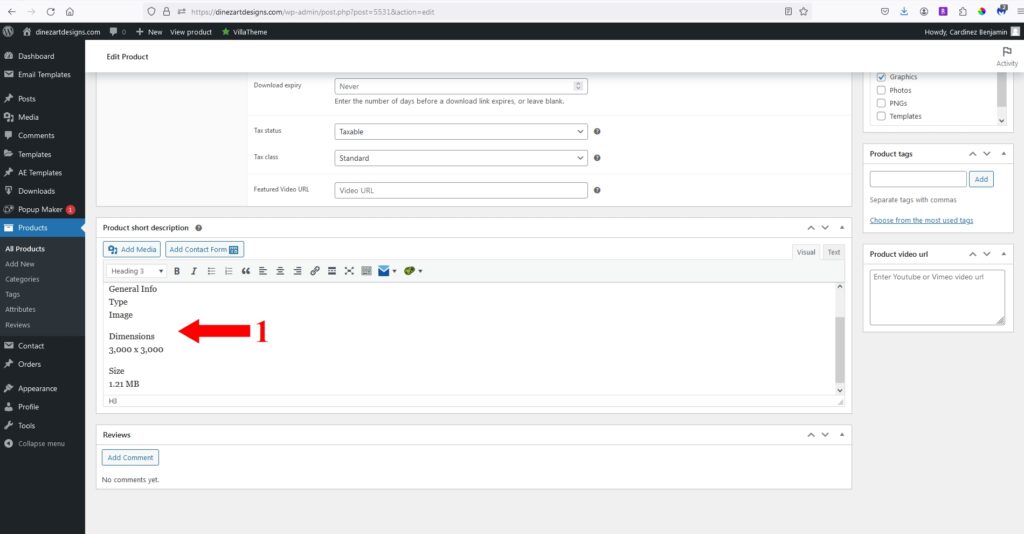
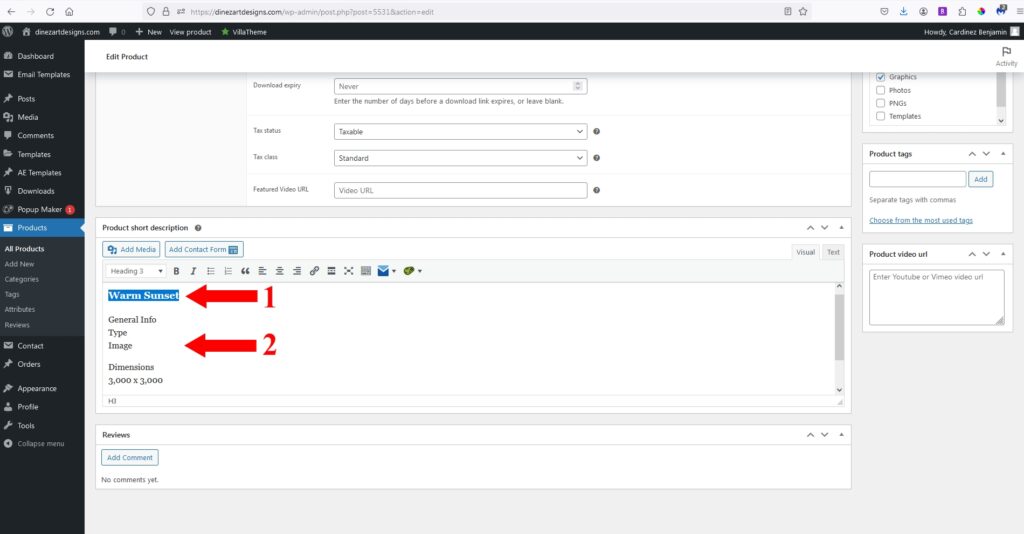
- Provide a description of the product. Note: This is a helpful method to describe your product, making it easily discoverable when users search for relevant word/phrases in this content. In such cases, ensure that it accurately applies to the product being sold.
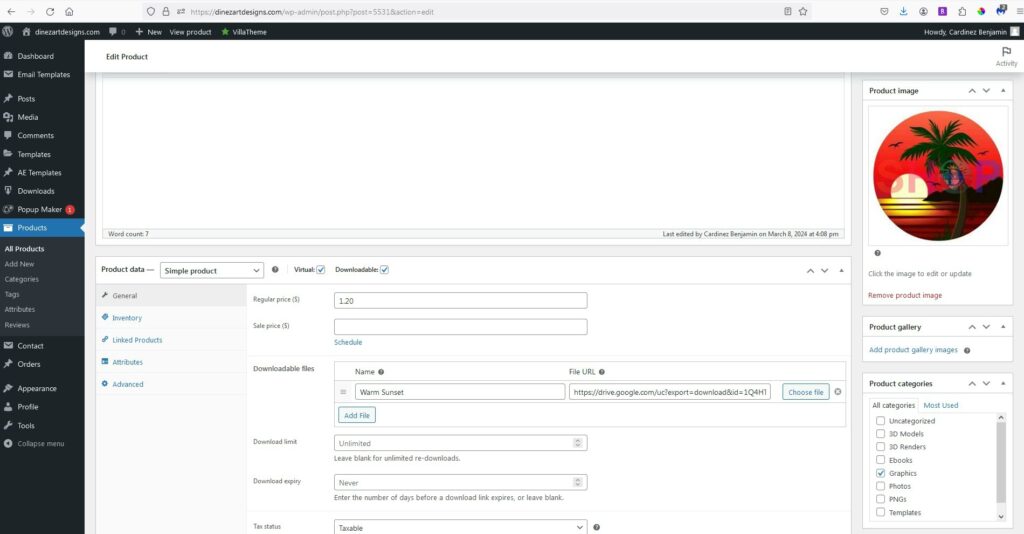
- Click Virtual.
- Click on Downloadable.
- For working out your price and getting a more accurate figure for your product you can navigate to this page.
- This would be the name given to the file to be download. (Make it meaningful so it can be easily identified when bought) Note that you can add multiple files if your product has many parts by simply clicking ‘Add file’ and adding the respective file/link.
- For a direct download link to the file(s) to be downloaded by your customer, this will depend on the cloud service you choose to upload to. For example, for Google Drive users, you would use the following prefix: https://drive.google.com/uc?export=download&id= This prefix is placed in front of the ‘file ID’ to provide a direct download link when customers click on it.
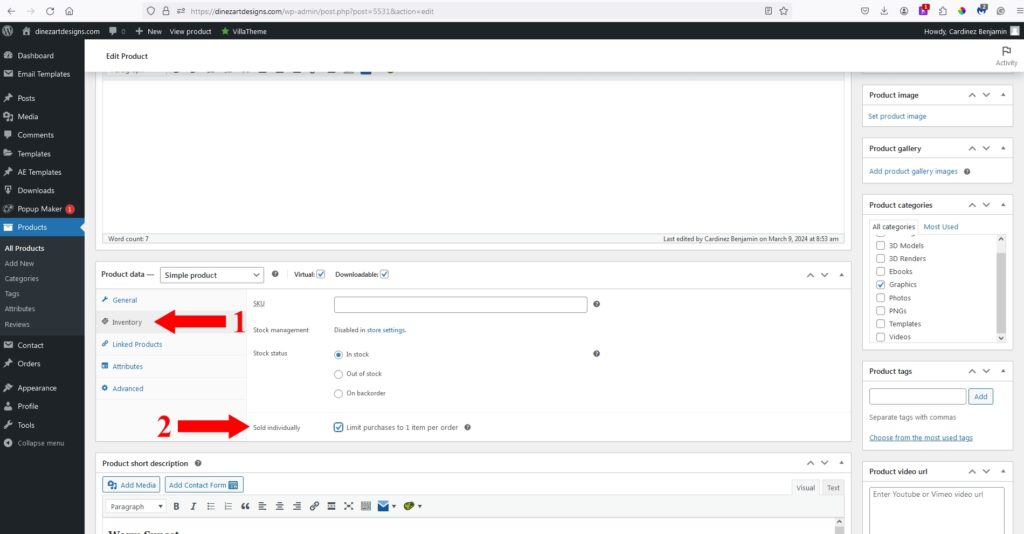
In the ‘Product data’ section
- Click on Inventory.
- Click on Sold Individually.
The reason for this is that, since you are selling a digital product, the system only allows the customer to add a quantity of 1 of that product at a time. For example, they can only add a quantity of 1 ‘Warm Sunset’ along with 1 of any other products they might be purchasing.
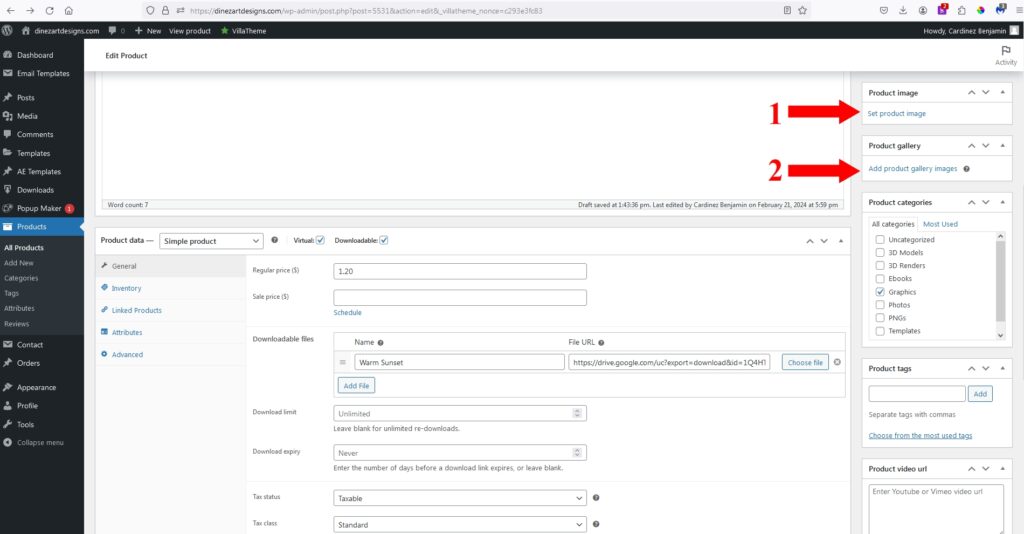
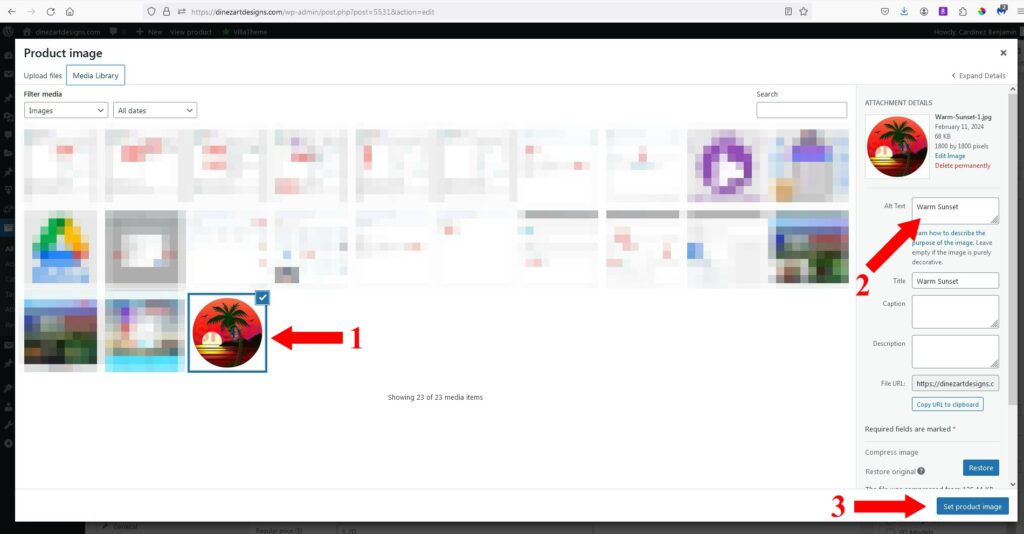
Now, let’s set the product image. Once you have your image(s) ready to be uploaded (compressed using Caesium or any other programs you choose to compress images with), follow these steps:
- Click ‘Set product image.’
- For ‘Add product gallery images,’ follow a similar process as in bullet list 1. This is useful when the product you are uploading has various sections or parts, and you want to provide additional screenshots for each of them.
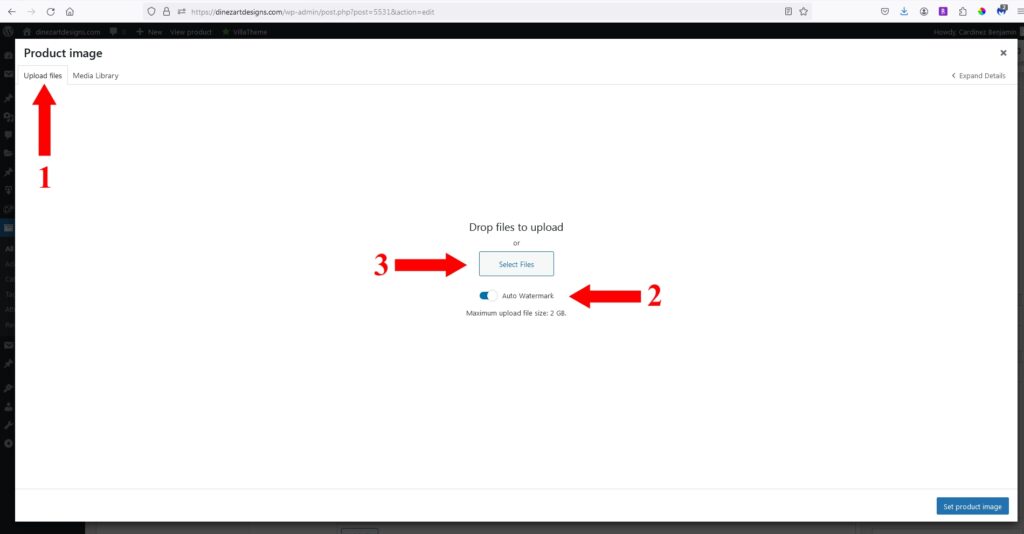
When you click on any of the above links and the dialogue box opens to add an image,
- Navigate to the ‘Upload File’ tab.
- Ensure that the ‘Auto watermark’ option is on, especially if you do not plan to watermark your images yourself. This will use the default ShopDigital268 logo as a watermark.
- Simply drag and drop your image into the window or click ‘Select files’ to browse and upload your image.
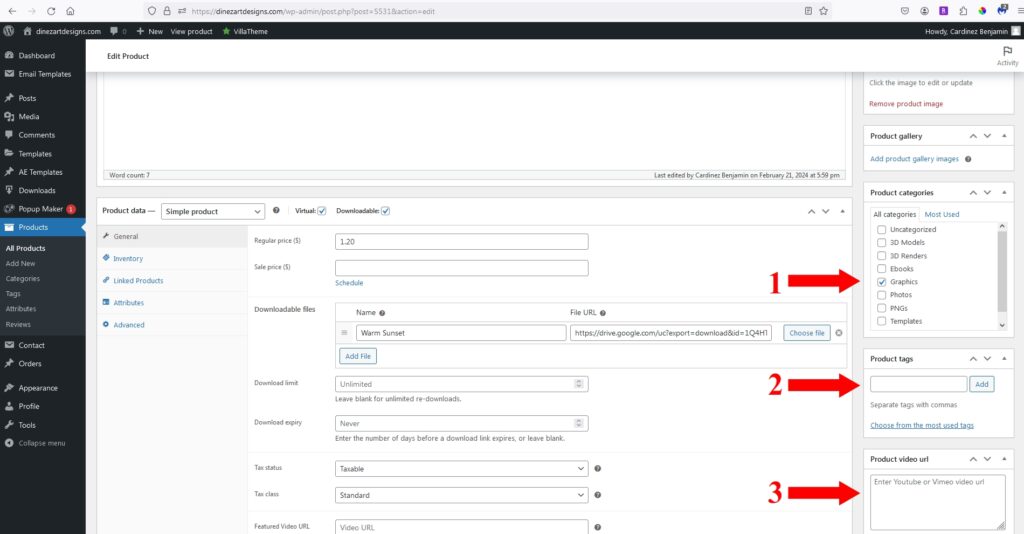
- In this step, you would add the product that you are adding to an appropriate category. Note that it can be added to multiple categories, but ensure that it truly applies to the product you are adding. The last thing you want is for a customer to go to a particular section and not find your product, or vice versa — you don’t want them going to a category and thinking, ‘That’s not even an e.g. “Photo”‘. This could negatively impact your customer’s experience and rating.
- Here, you can add tags. However, if you provide a proper product description, the use of tags may not be necessary, as your product should be found using keywords from your listing.
- You can also use this section to link to a video clip showcasing the product and its uses.
I explained how you could achieve this in the post entitled “How To Handle Google Drive Files“
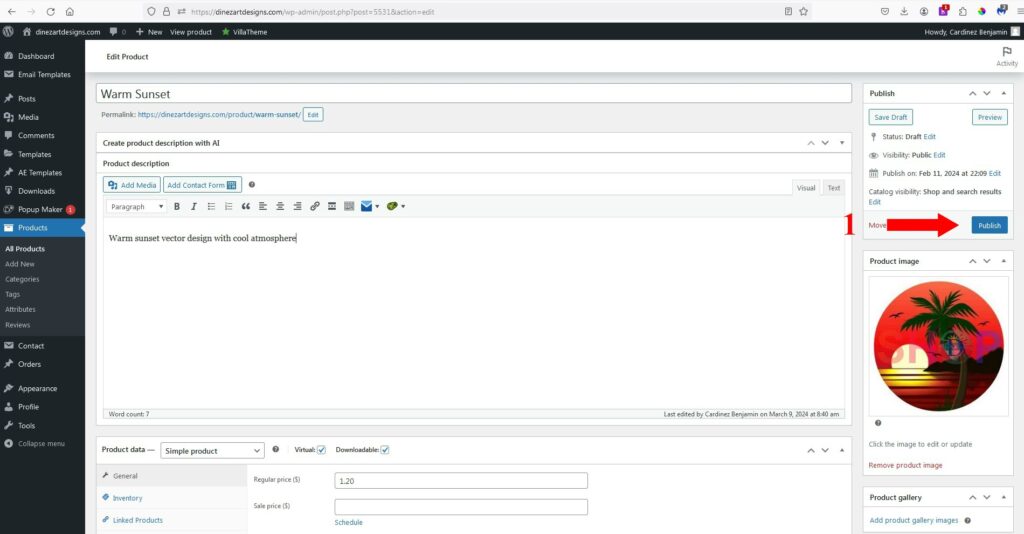
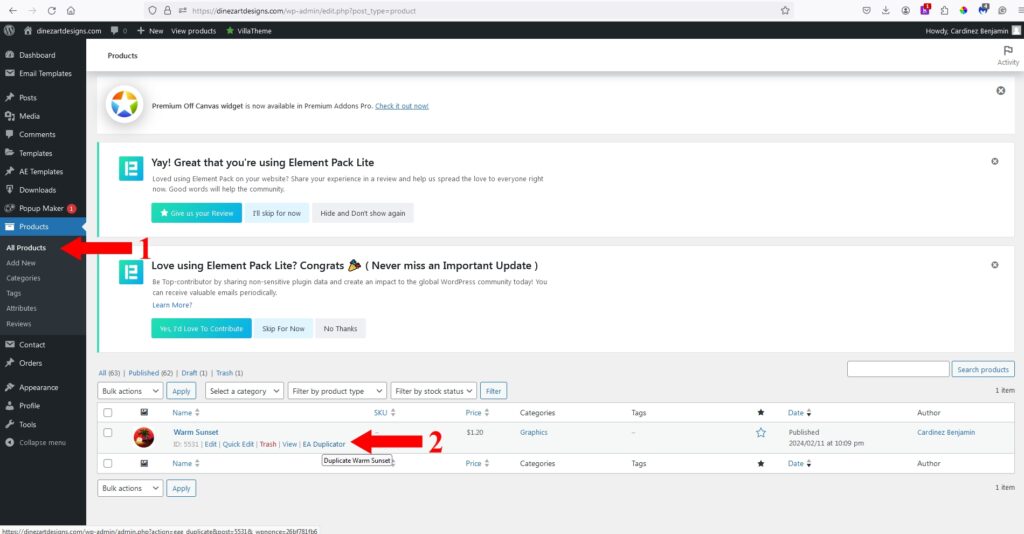
You can now navigate to ‘All Products,’ and for the item you just added (‘Warm Sunset’), you can click ‘EA Duplicator.’ This will create a copy of that product in draft mode. Then, proceed to edit and adjust the necessary fields to reflect the new product you are adding. Once you have made all the changes, simply click ‘Publish.’
