How To Handle Google Drive files. This Way It Is Structured Better
If you have a Google/Gmail account, you already have access to Google Drive, which can be reached by typing ‘Google Drive’ into the Google search bar; it should be the first link to appear. Alternatively, you can access it directly using this link: https://drive.google.com/
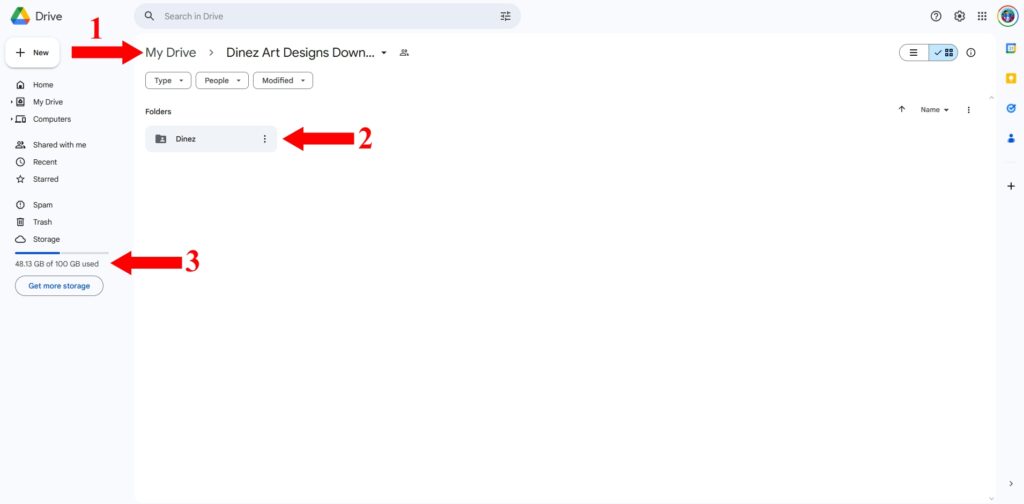
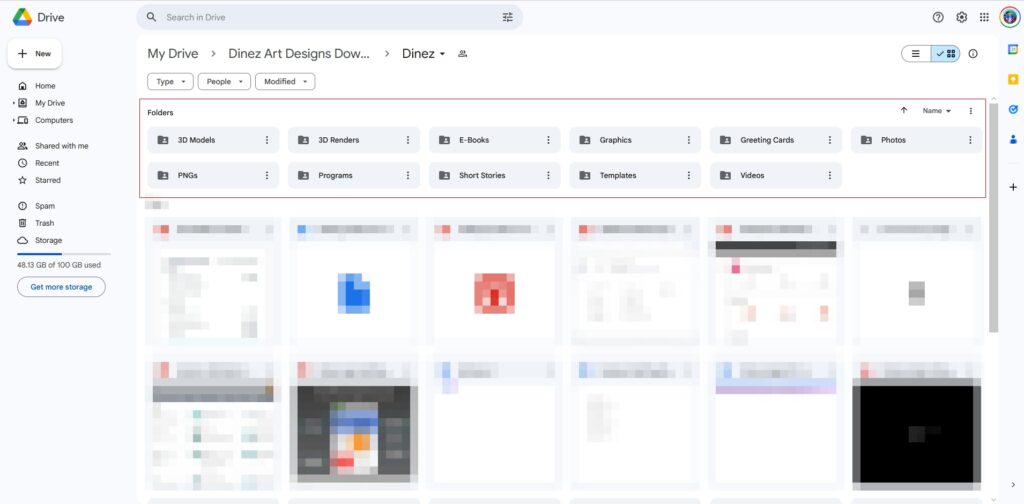
- ‘My Drive’ indicates the root location where you would create a sub-directory folder, structured for adding your downloadable files.
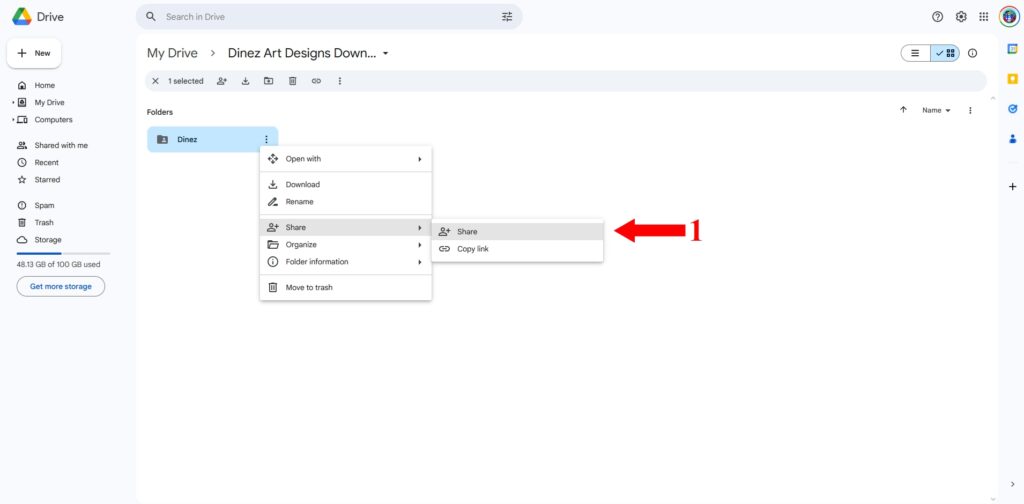
- This folder can be shared, allowing others access to all the files within through a shareable link. It is identified by a folder icon with the user symbol, indicating that it has been shared.
(any file stored in the sub-directory would automatically be shared since parent folder is already shared) - Google typically provides 15GB of space for hosting your files. However, if you’re someone who stores a significant amount of files and regularly backs them up, you can purchase additional space as needed over time.
(It’s important to monitor the 15GB allocation, as if it approaches full capacity, you will receive alerts regarding the potential implications, such as the inability to receive emails and the inability to back up new files, among others.)
Within the respective folders, you would place your different files. For files with multiple parts or extensions, you can place them within a zip folder and then put that zip folder in the most appropriate directory. List the contents of the zip in the ‘Product Description,’ or alternatively, you can also link to individual files in multiple locations.
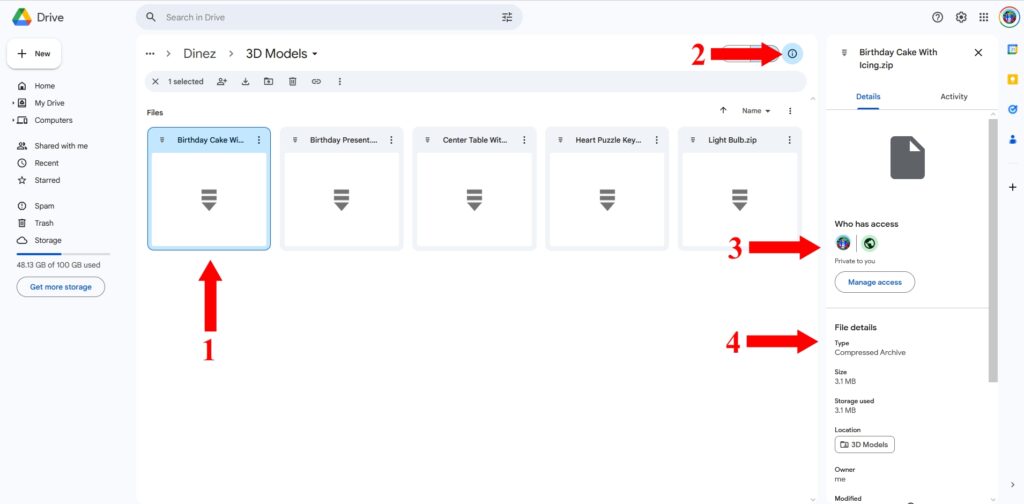
- It shows the file within the sub-directory. In this case, the file had multiple parts, so the files were placed in a zip folder.
- By clicking on the file in the sub-directory and selecting the show/hide details button, you can view the ‘File details’ of the selected file.
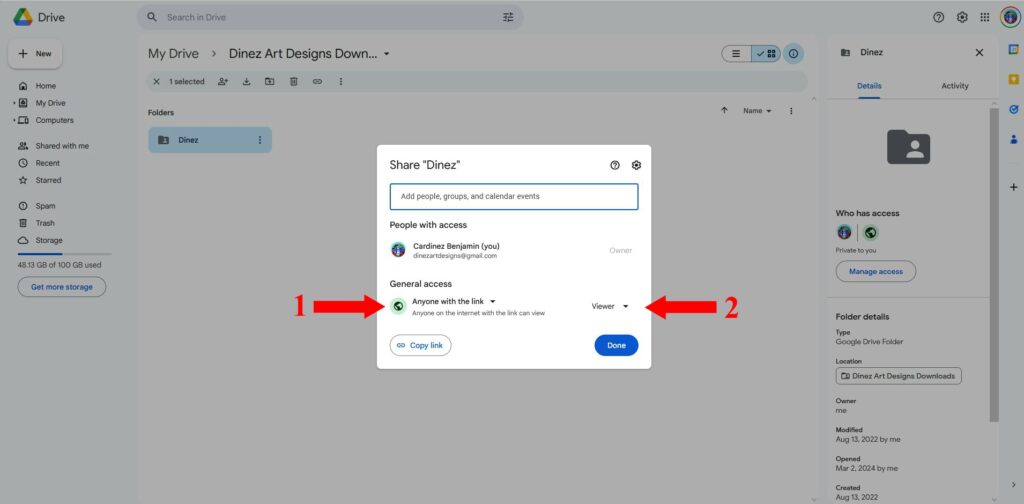
- It indicates that the file is being shared with a person who has access to your link. This setup was explained in step 2 above in this tutorial.
- Display the ‘File details’ that you chose to show/hide in the previous step.
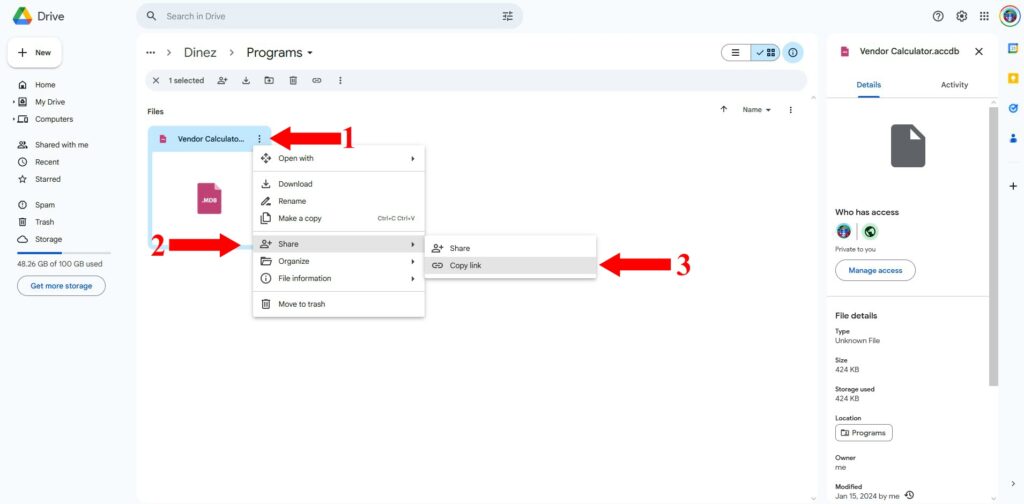
Note that this information will be used to populate the ‘Product short description’ when adding a new product, listing the properties of the file being added.
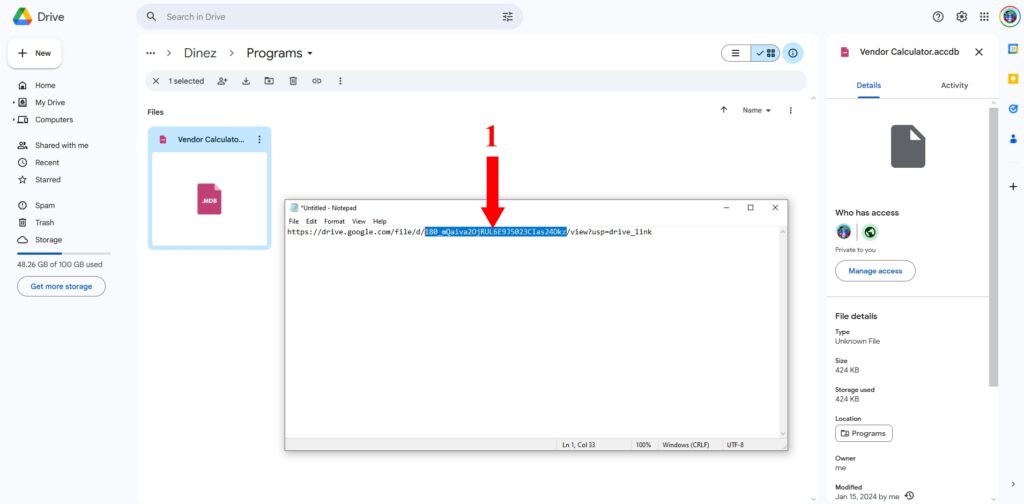
Now you can easily paste that link into a Notepad file, Word document, or WordPad. As shown in the image, copy the file ID, which in this case is ‘180_mQaiva2OjRUL6E9J5023CIas24Dkz‘, and then paste it directly behind the ‘https://drive.google.com/uc?export=download&id=‘ portion of the link.
The resulting direct download link would appear like this: ‘https://drive.google.com/uc?export=download&id=180_mQaiva2OjRUL6E9J5023CIas24Dkz‘.
