Using Caesium To Compress Images
Caesium is a free, open-source program that offers both online and software-based compression for most of your image files.
While the website compresses your images by converting them to the .webp format, which is a type of compression developed by Google that supports both lossless and lossy compression, it excels in saving space rather than providing a preview image.
Therefore, if you post an image you’re trying to sell at full quality or resolution without combining the raw image with a watermark, it’s as simple as clicking on the image to make it full screen, then right-clicking and saving it. Disabling right-clicking when previewing images won’t prevent users from saving them, as a basic understanding of .html allows images to still be downloaded, thereby bypassing the aforementioned technique for downloading images by right-clicking. Thus, this tutorial focuses solely on compressing and downsizing images.
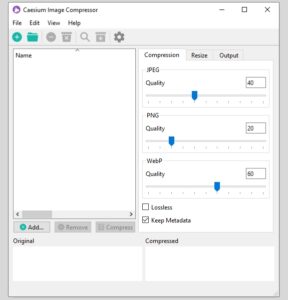
Compression Tab
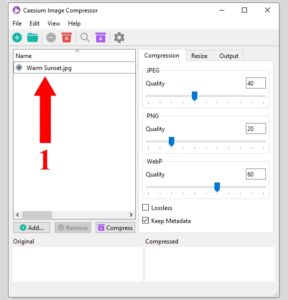
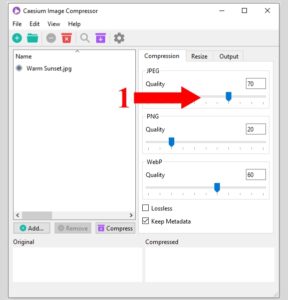
You can adjust the slider or simply type in the percentage you would like to set the quality to. It’s important to note that this program is not a converter; the file you put in is the file you get out. For example, in this case, if you have a .jpg file, you would adjust the JPEG slider and so on.
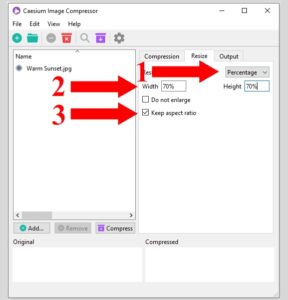
Resize Tab
On this tab, I recommend using ‘Percentage.’ With ‘Keep aspect ratio’ checked, you can type in the percentage you would like to change to. It’s important to note that without ‘Keep aspect ratio’ checked, this might/will distort the image, especially if the width and height have different percentages.
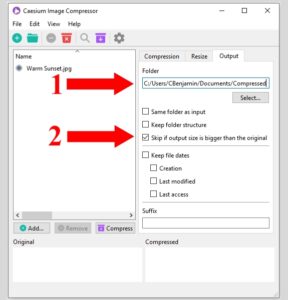
Output Tab
On this tab, you can choose an output location different from that of the original file. Additionally, you can experiment with the other settings. One setting that I find important, and it is checked by default, is ‘Skip if output size is bigger than the original.’ However, I would not recommend checking the option ‘Same folder as input’ because it may prompt you to overwrite the original file.
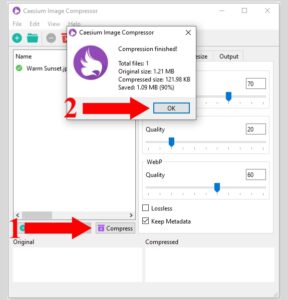
You can now click ‘Compress,’ which will export the compressed images to the selected folder with the specifications you have chosen. This will display the total number of files, the original size of the files, the compressed size, and how much you saved in size and percentage. If you are satisfied with the quality of your compressed image (after opening and visually inspecting and comparing it side by side with the original), you can click ‘OK’ and exit the program. If not, you can adjust the settings until you find a sweet spot, and then apply these settings to all the following files. Note that batch converting might take a bit longer to process.
With that said Happy Image Compressing.
